 omnideck
Install omnideck.
Free for Mac, Windows, and Linux.
Choose your computer, download the app, and follow the steps below. The first setup takes several minutes. Before your first chat, you connect an AI model.
omnideck runs on a computer, not a phone. Open this page on your Mac or PC to install it.
Before you start
- A computer with macOS, Windows 11, or desktop Linux and at least 4 GB of memory.
- Permission to install software. Setup installs the parts omnideck runs on, and your computer asks you to approve it.
- An internet connection. The application image is about 680 MB on x86-64 or 850 MB on ARM64. A fresh setup also downloads operating-system components and Podman files, so the total can exceed 1 GB.
- An AI model to connect. Use an API key from Anthropic, OpenAI, or OpenRouter, which bills API use to your account with them. Or use a model you already downloaded with Ollama on this computer.
omnideck is free and needs no omnideck account. More about connecting a model
Choose your system
Download for Mac
Choose the DMG that matches your Mac. To check, open the Apple menu → About This Mac. A Chip line means Apple silicon. A Processor line that names Intel means Intel.
Install and set up omnideck
-
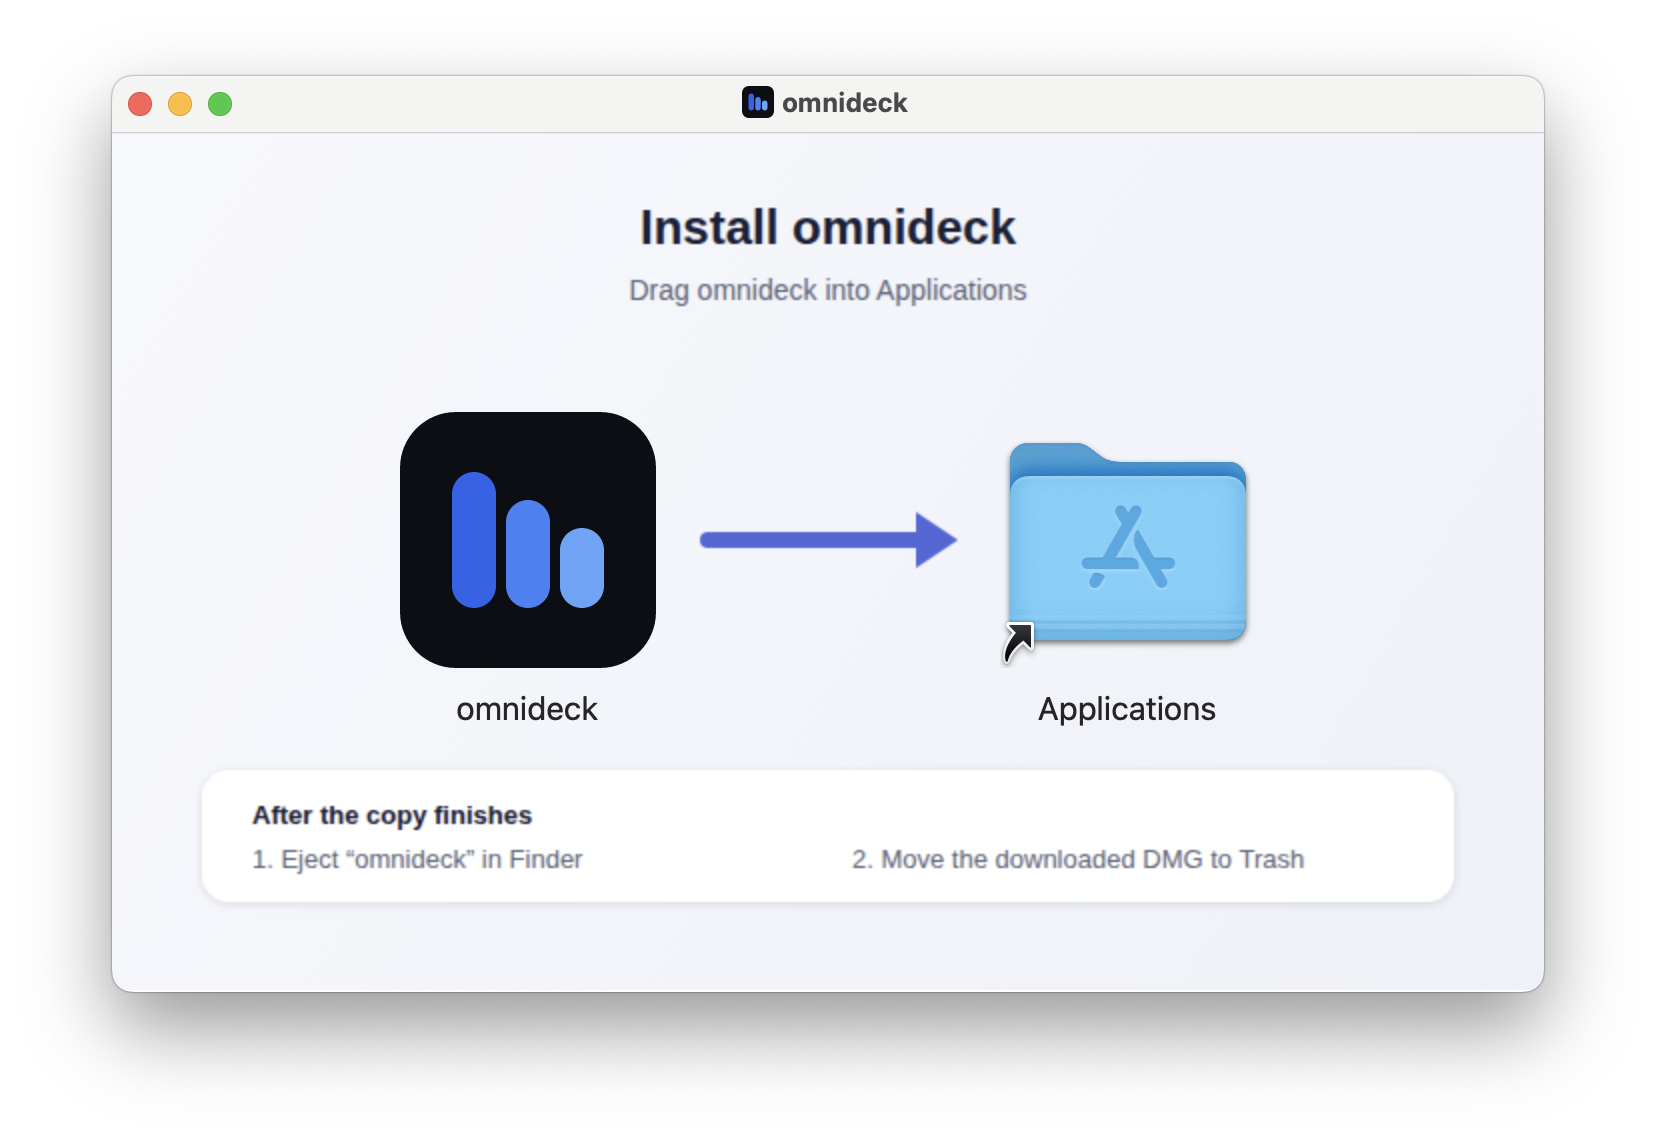
Install omnideck
Open the DMG, drag omnideck onto the Applications shortcut, then eject the disk image.
-
Open omnideck
Open omnideck from Applications. The first time, macOS checks the app and may ask whether you want to open an app downloaded from the internet. Select Open.
If macOS instead says it can’t verify omnideck or that it may harm your Mac, don’t open it. Move it to the Trash, download the DMG again from this page, and check its fingerprint.
-
Set up omnideck
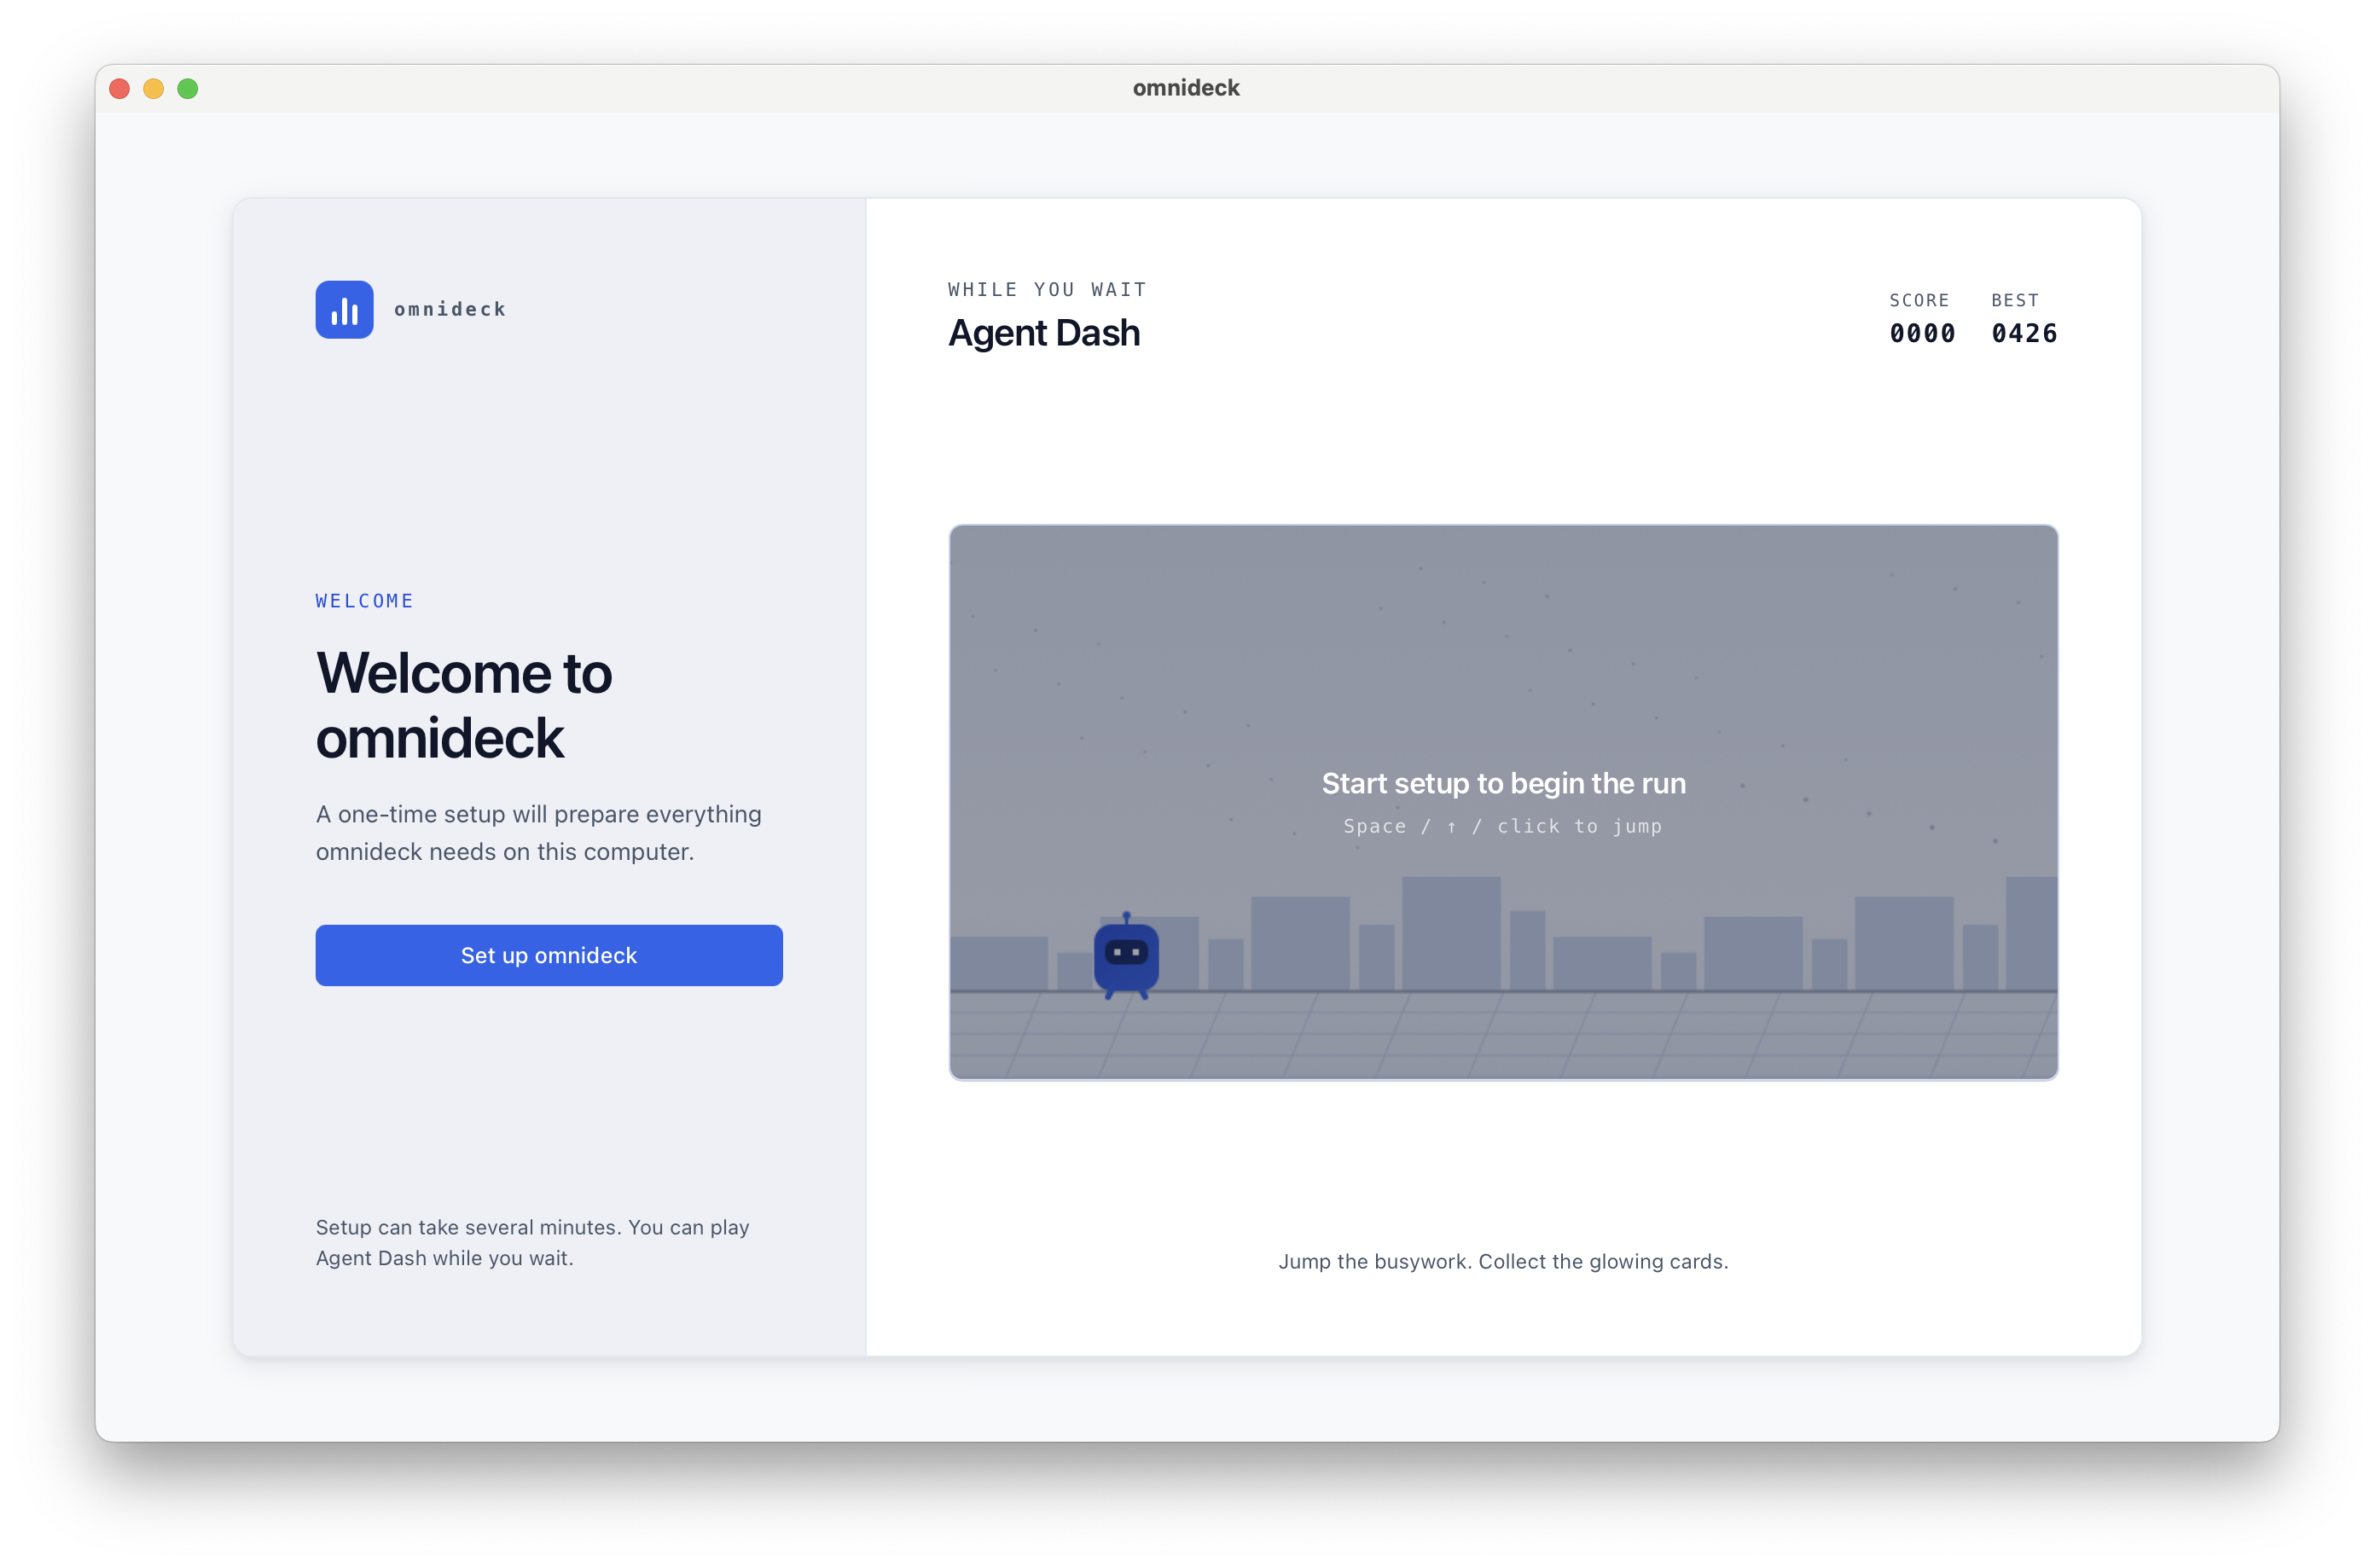
Select Set up omnideck. Setup gets your Mac ready and downloads omnideck’s files. It takes several minutes, and you can play Agent Dash while you wait.
-
Finish setup
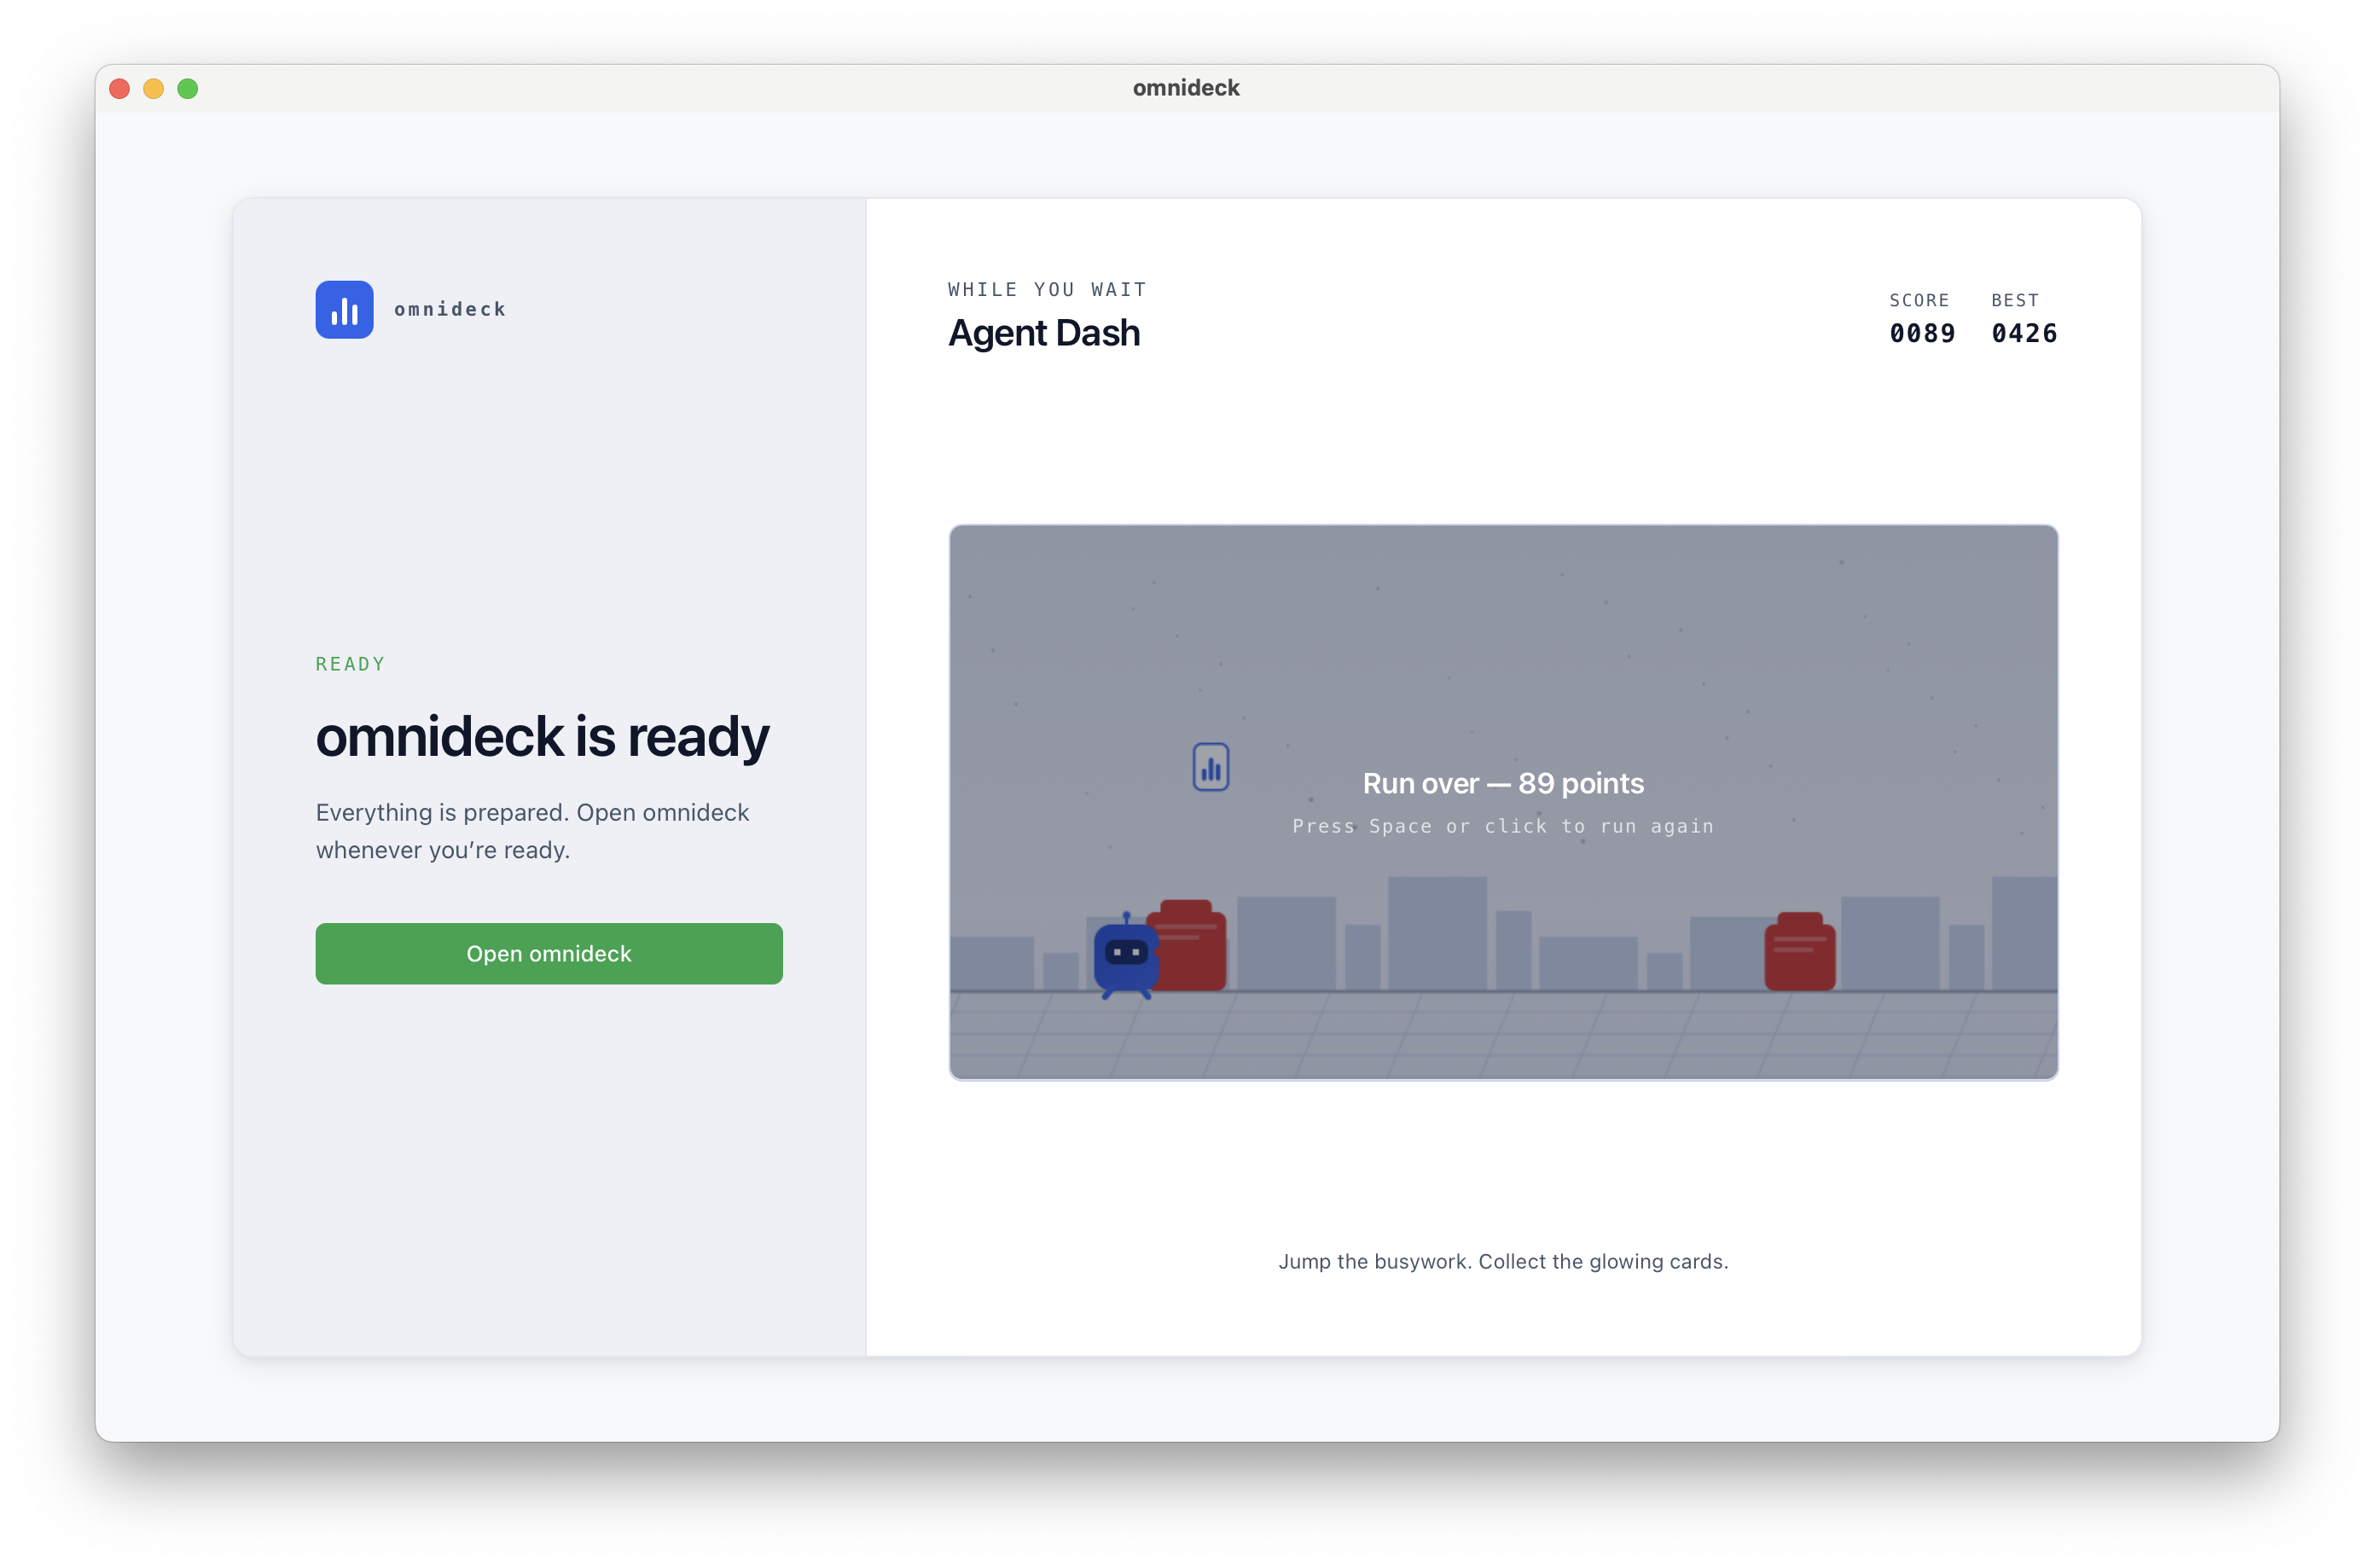
When setup reports that omnideck is ready, select Open omnideck.
-
Connect an AI model
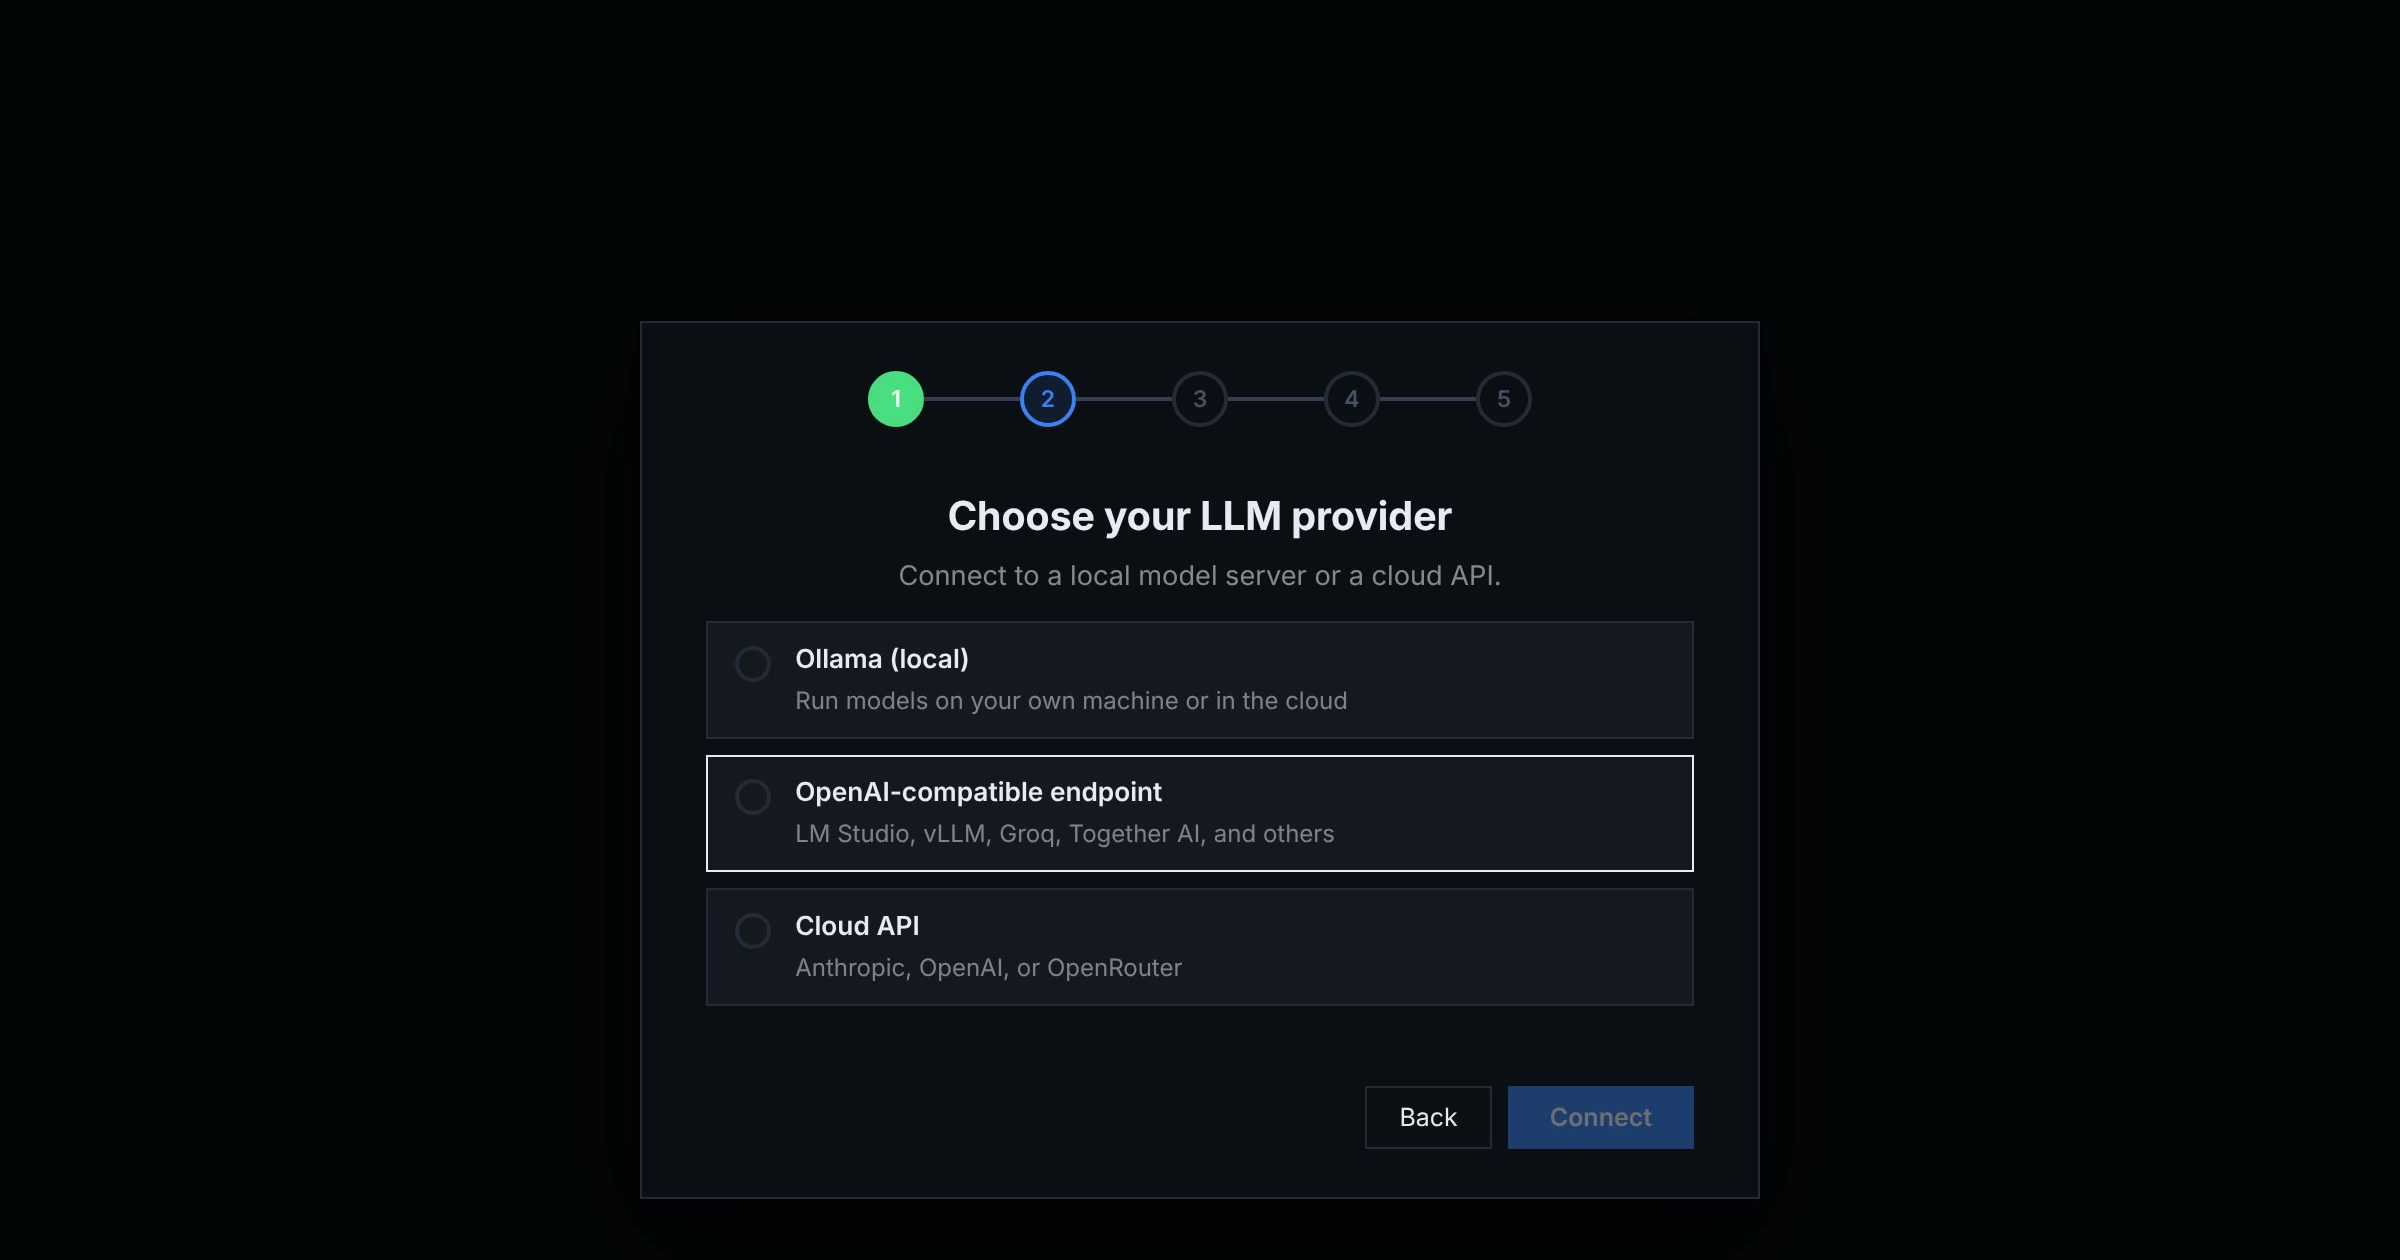
Before your first chat, omnideck asks which AI model to use. Select Get Started, then choose one:
- Cloud API: paste an API key from Anthropic, OpenAI, or OpenRouter.
- Ollama (local): use a model that is already downloaded in Ollama on this computer.
- OpenAI-compatible endpoint: use a server such as LM Studio.
Select Connect, then pick a main model. The vision model is optional. Select Skip — I’ll configure this later if you don’t have one.
-
Start with the welcome tour
Select Start Chatting. Your first chat is a short tour of omnideck. It ends with requests you can try, such as connecting your calendar.
For your own first job, select New chat and describe what you need in plain words. For example: “Plan five weeknight dinners for a family of four. One of us doesn’t eat nuts. Then make one shopping list.”


Download for Windows
Choose the EXE that matches your PC. To check, open Settings → System → About and look at System type. An x64-based processor means x86-64. An ARM-based processor means ARM64.
Install and set up omnideck
-
Optional: install the tested WSL version first
omnideck 0.1.0-beta.13 was tested on Windows 11 (x86-64) with WSL 2.7.11 installed first. 0.1.0-beta.14 changes the Mac downloads and the app icon, not Windows setup, but it hasn’t been tested separately on this route. To use that route on a PC that doesn’t have WSL yet, do this before you open the omnideck installer: download
wsl.2.7.11.0.x64.msifrom Microsoft’s WSL 2.7.11 release. In Windows Features, turn on Virtual Machine Platform and Windows Subsystem for Linux. Open the downloaded installer, then restart Windows. -
Approve the installer
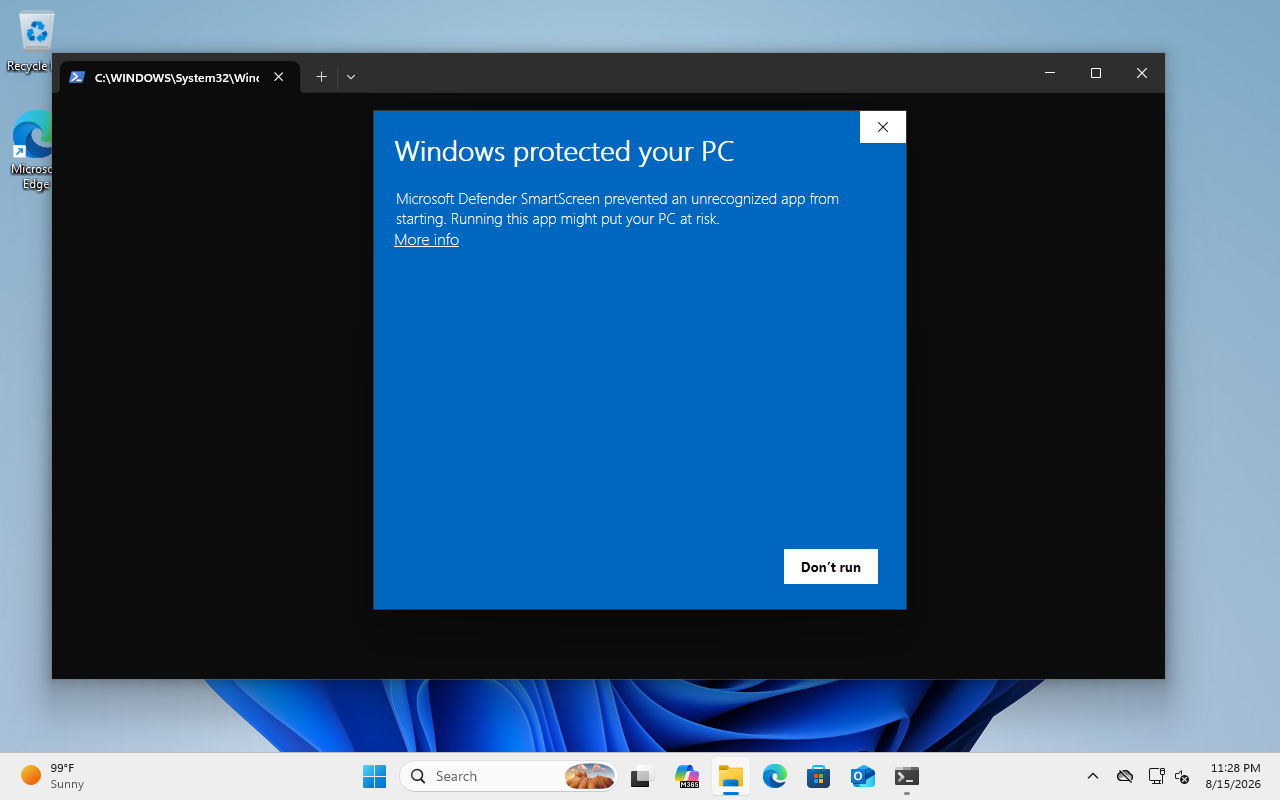
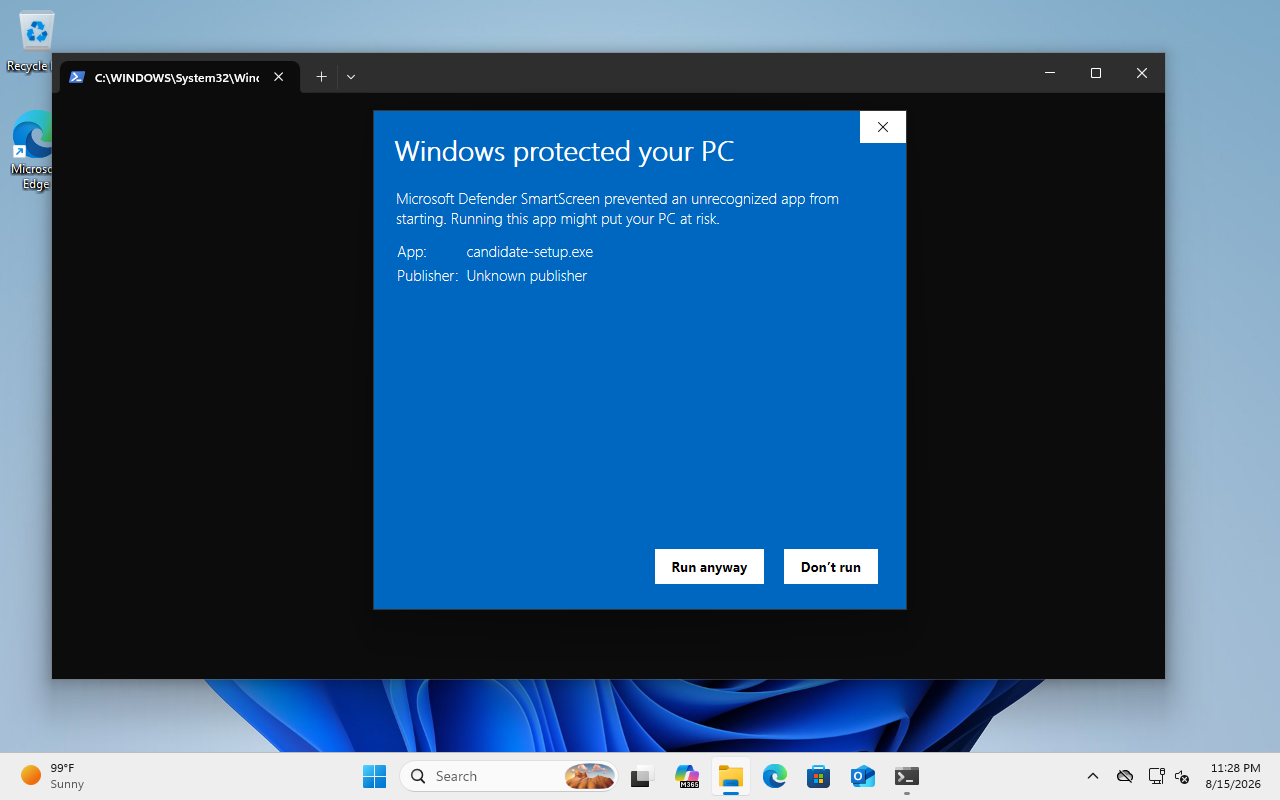
If SmartScreen opens, select More info. This preview is unsigned, so Windows may show Unknown publisher. Check that the app filename matches your download above and verify its SHA-256 fingerprint before selecting Run anyway.
-
Install omnideck
Select Next on the welcome screen, keep the default installation folder (
%LOCALAPPDATA%\omnideck), and continue. When installation completes, select Next. Leave Run omnideck checked and select Finish, then select Set up omnideck in the app.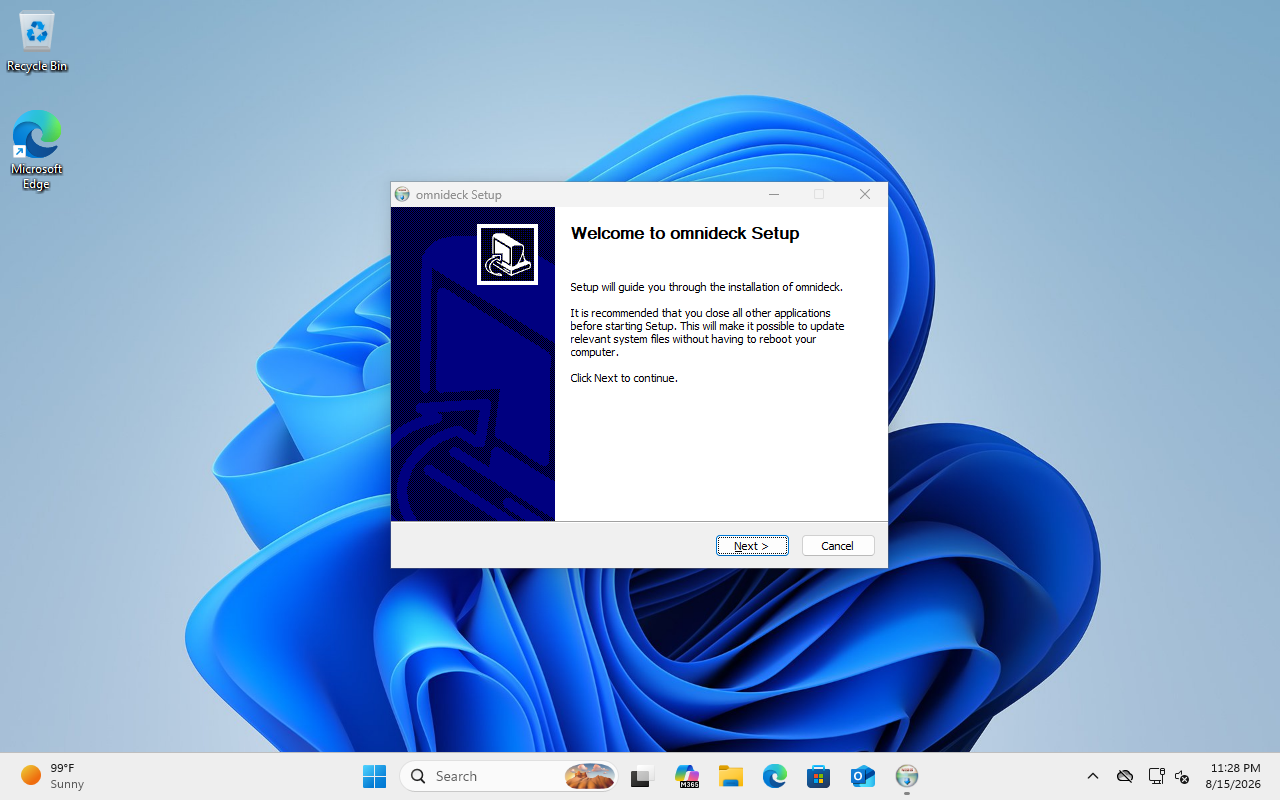
-
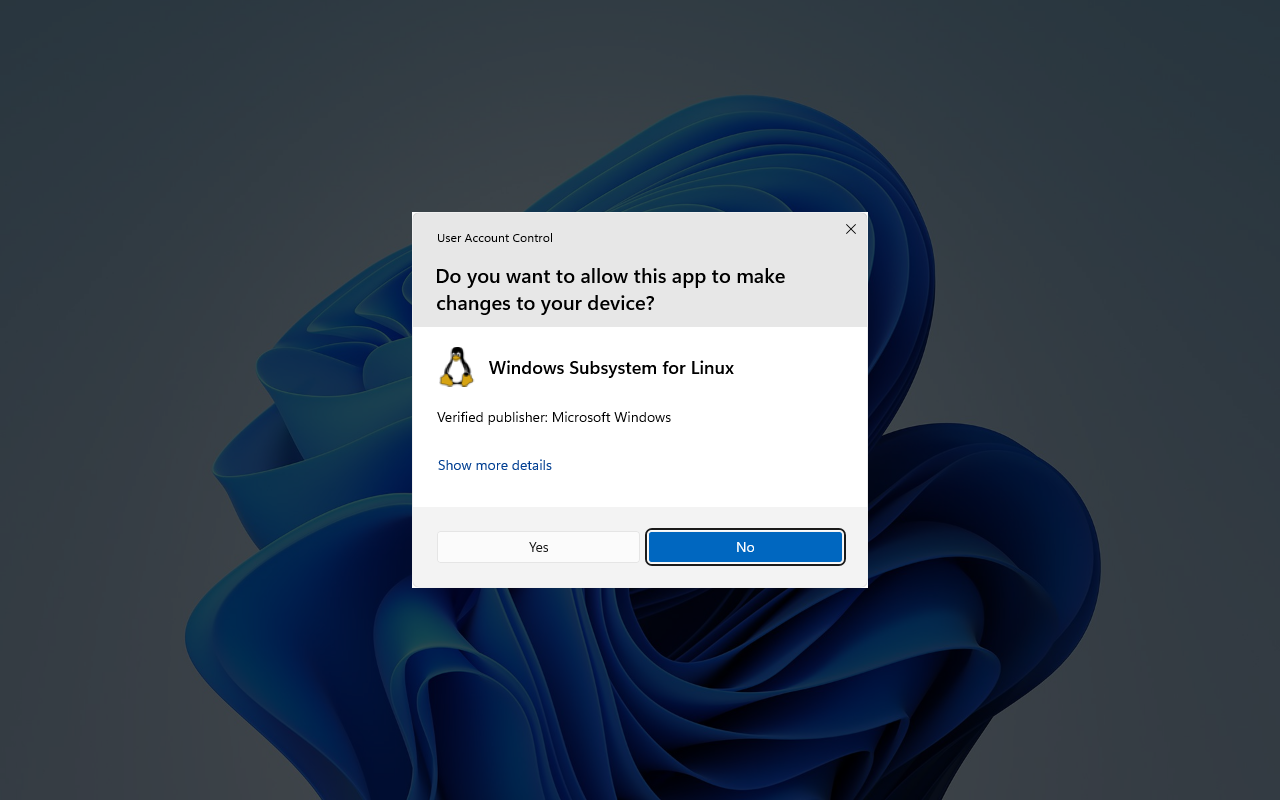
Approve required Windows changes
Select Yes when User Account Control asks to prepare a required Windows component.
-
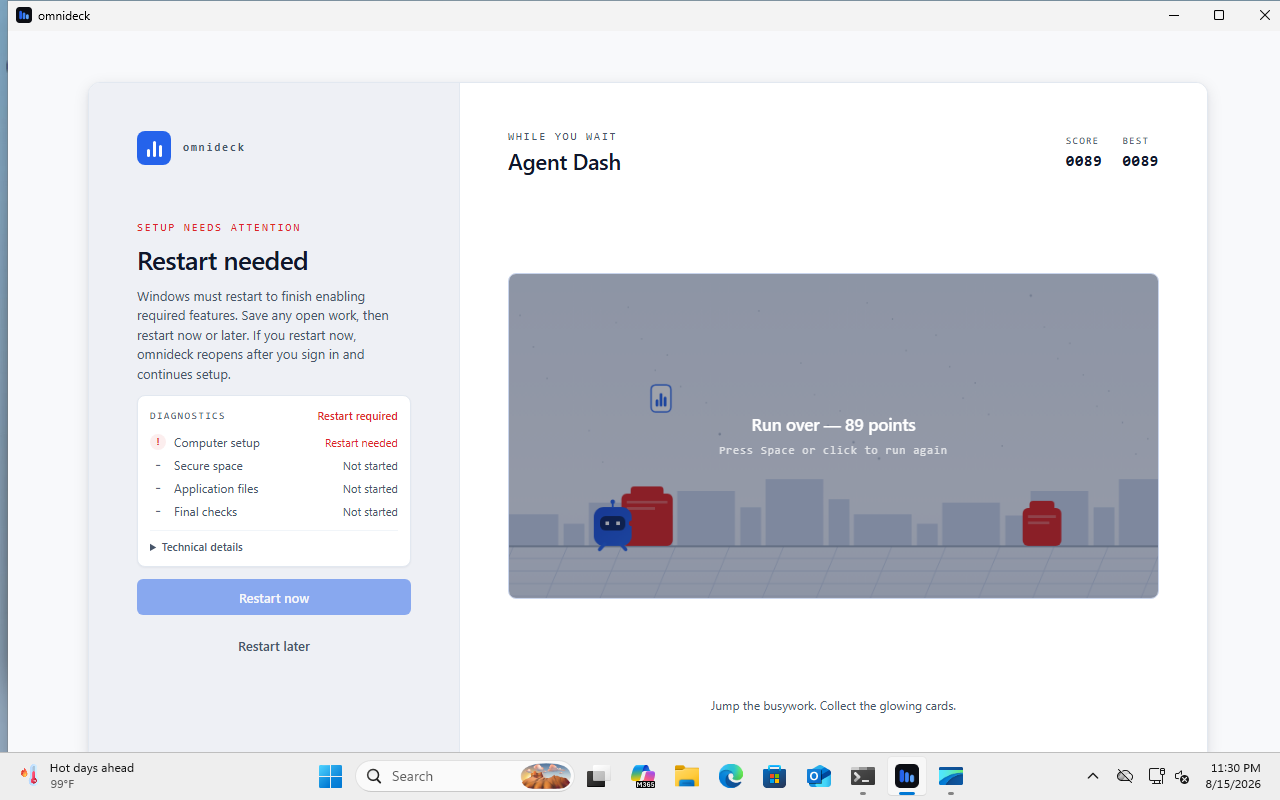
Restart if prompted
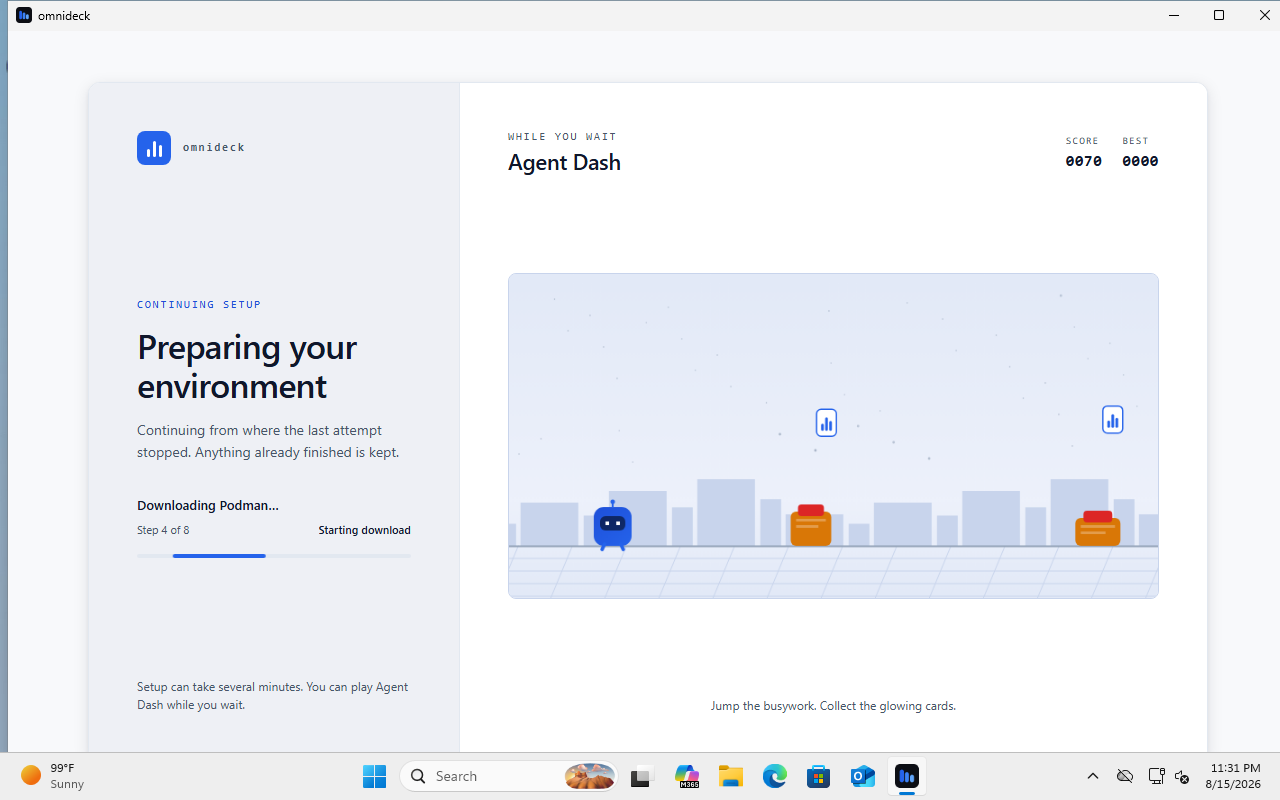
Select Restart now. After you sign back in, omnideck reopens and continues setup automatically.
-
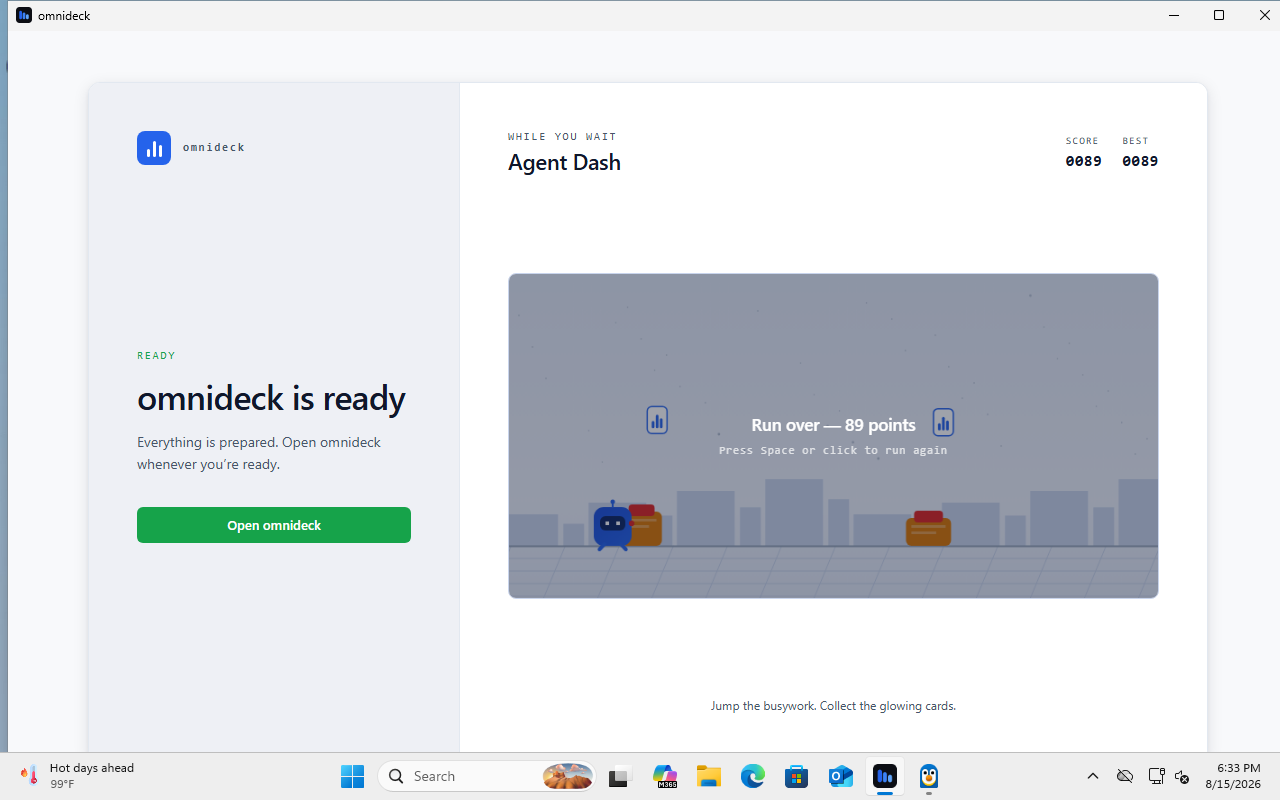
Finish setup
When setup reports that omnideck is ready, select Open omnideck.
-
Connect an AI model
Before your first chat, omnideck asks which AI model to use. Select Get Started, then choose one:
- Cloud API: paste an API key from Anthropic, OpenAI, or OpenRouter.
- Ollama (local): use a model that is already downloaded in Ollama on this computer.
- OpenAI-compatible endpoint: use a server such as LM Studio.
Select Connect, then pick a main model. The vision model is optional. Select Skip — I’ll configure this later if you don’t have one.
-
Start with the welcome tour
Select Start Chatting. Your first chat is a short tour of omnideck. It ends with requests you can try, such as connecting your calendar.
For your own first job, select New chat and describe what you need in plain words. For example: “Plan five weeknight dinners for a family of four. One of us doesn’t eat nuts. Then make one shopping list.”


Download for Linux
Use the DEB on Debian or Ubuntu, the RPM on Fedora, or the AppImage on Ubuntu 24.04 or newer. Check the Linux requirements below before using another distribution. To check your architecture, run uname -m. x86_64 means x86-64, and aarch64 means ARM64.
Install and set up omnideck
-
Install omnideck
In a terminal, run the command for the package and architecture you downloaded, from the folder that holds the file. Linux asks for your password.
x86-64
DEB · Debian or Ubuntusudo apt install ./omnideck_0.1.0-beta.14_amd64.debRPM · Fedorasudo dnf install ./omnideck-0.1.0-beta.14-1.x86_64.rpmARM64
DEB · Debian or Ubuntusudo apt install ./omnideck_0.1.0-beta.14_arm64.debRPM · Fedorasudo dnf install ./omnideck-0.1.0-beta.14-1.aarch64.rpmUsing the AppImage on Ubuntu
Keep the downloaded AppImage in a permanent folder. In a terminal in that folder, make it executable and launch it using the command for your architecture.
x86-64
chmod +x ./omnideck_0.1.0-beta.14_amd64.AppImage
./omnideck_0.1.0-beta.14_amd64.AppImage
ARM64
chmod +x ./omnideck_0.1.0-beta.14_aarch64.AppImage
./omnideck_0.1.0-beta.14_aarch64.AppImage
If it reports that
libfuse.so.2is missing, install the FUSE 2 library withsudo apt install libfuse2t64on Ubuntu 24.04, then launch it again. See the AppImage FUSE guide for other versions.Open the AppImage file again whenever you want to start omnideck; it does not install a DEB or RPM package.
-
Set up omnideck
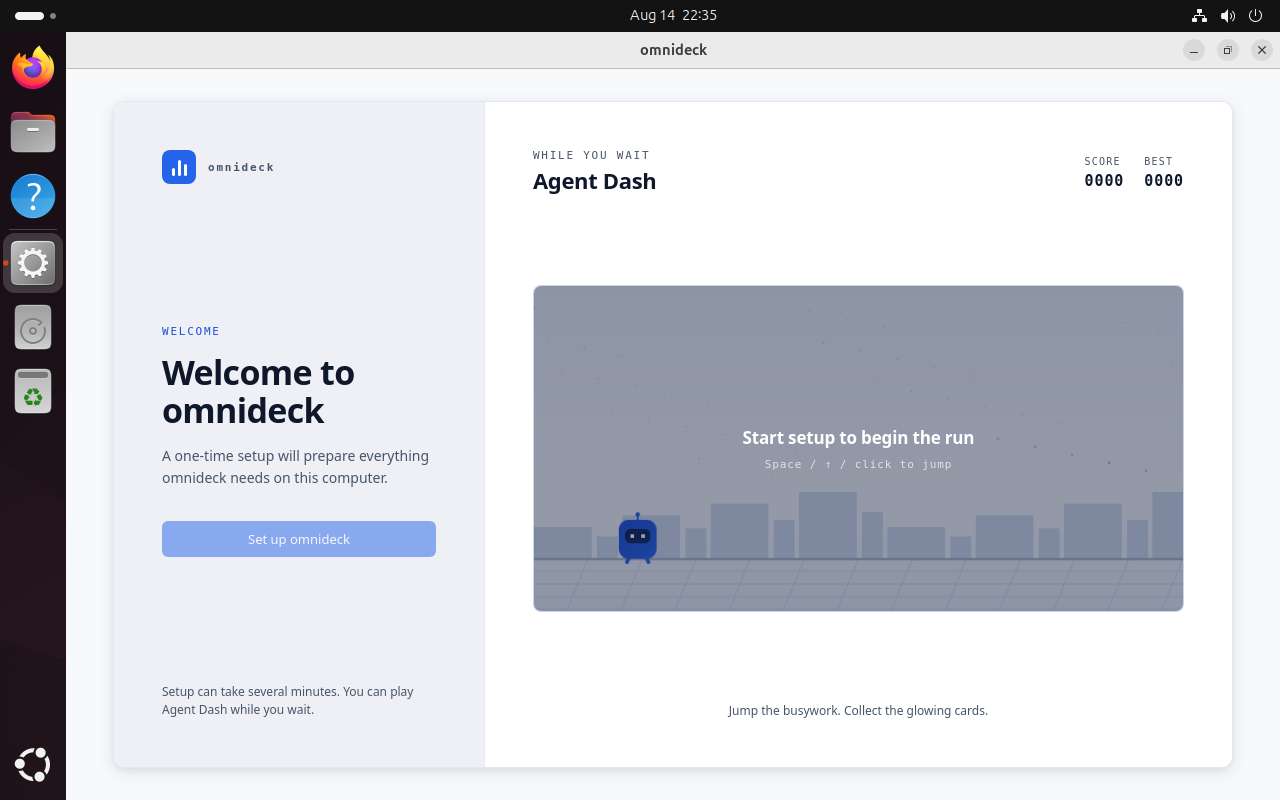
Open omnideck from your application menu, or launch the AppImage, and select Set up omnideck.
-
Approve the setup
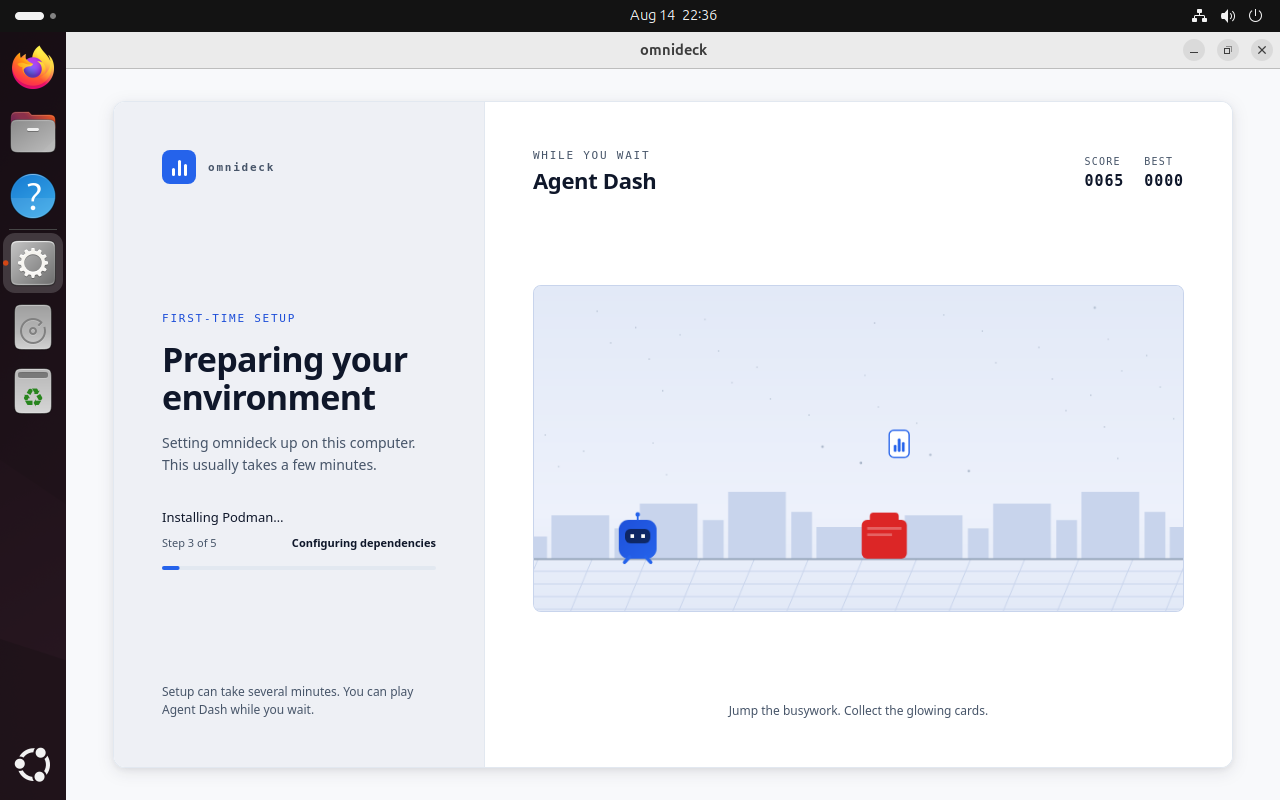
Setup installs the container runtime omnideck runs in, so Linux may ask for an administrator password. Then it downloads omnideck’s files. This takes several minutes.
-
Finish setup
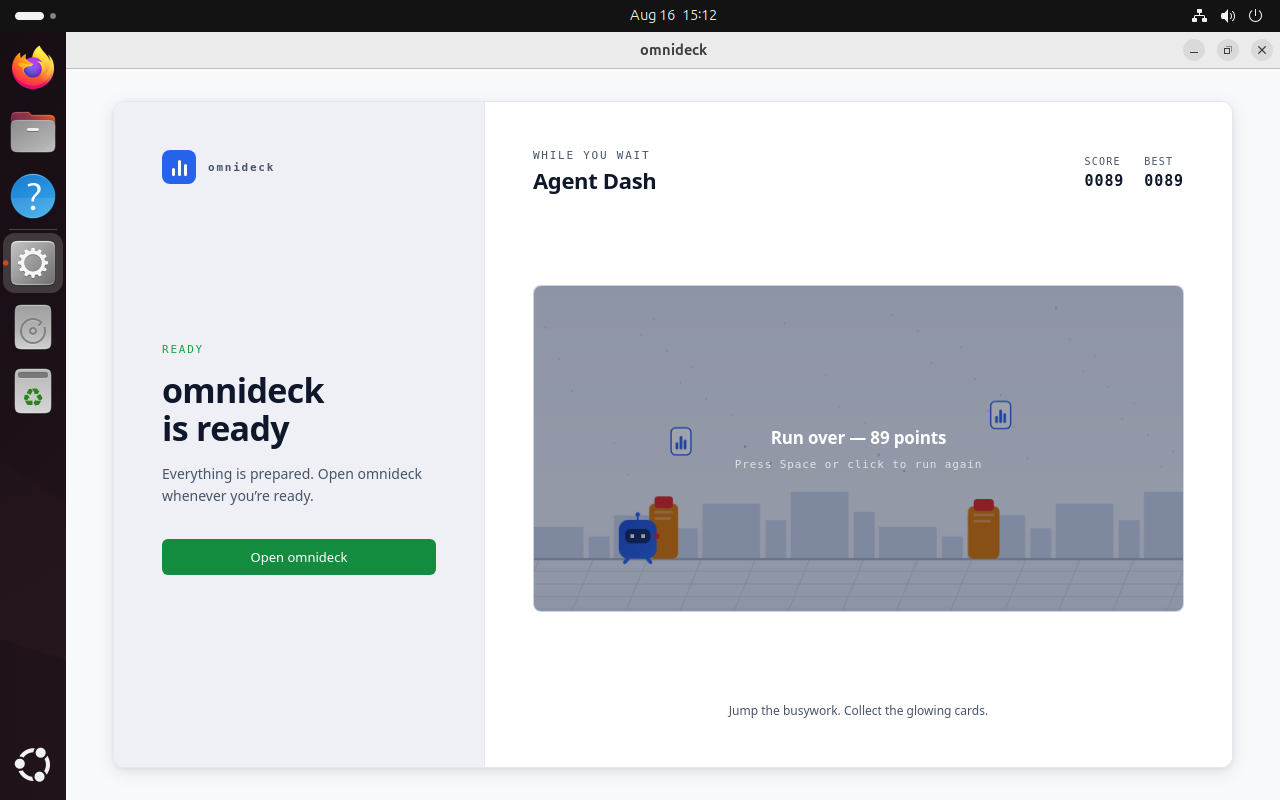
When setup reports that omnideck is ready, select Open omnideck.
-
Connect an AI model
Before your first chat, omnideck asks which AI model to use. Select Get Started, then choose one:
- Cloud API: paste an API key from Anthropic, OpenAI, or OpenRouter.
- Ollama (local): use a model that is already downloaded in Ollama on this computer.
- OpenAI-compatible endpoint: use a server such as LM Studio.
Select Connect, then pick a main model. The vision model is optional. Select Skip — I’ll configure this later if you don’t have one.
-
Start with the welcome tour
Select Start Chatting. Your first chat is a short tour of omnideck. It ends with requests you can try, such as connecting your calendar.
For your own first job, select New chat and describe what you need in plain words. For example: “Plan five weeknight dinners for a family of four. One of us doesn’t eat nuts. Then make one shopping list.”


If setup stops
omnideck explains what stopped setup and shows a next step, such as approving a permission prompt or restarting Windows. Follow that step, then select Try again when it is offered. If it stops again, open Technical details and share them in the community Slack or a GitHub issue.
Windows: WSL initialization times out
If Technical details contains Wsl/Service/CreateInstance/ERROR_TIMEOUT while preparing WSL, save your work, restart Windows, and reopen omnideck to resume setup. Use the separate memory.max workaround below only if that error appears.
Windows: setup stops with a memory.max error
On Windows 11 25H2 with WSL 3.0.1 and Podman 6.0.2, desktop 0.1.0-beta.13 can show Setup didn’t finish with crun: open memory.max for writing: No such file or directory in Technical details. The issue is not fixed in desktop 0.1.0-beta.14. The same runtime issue affects CLI v0.11.0-beta.6 through v0.11.0-beta.8. CLI beta.7 adds a direct link to these recovery steps; it does not change WSL settings.
The following workaround was checked through desktop setup and opening the workspace, and through CLI startup and restart with its memory limit intact.
It changes WSL’s resource-control isolation for all WSL 2 distributions in your Windows account.
- Close omnideck and save any work in your WSL distributions.
- Open
%UserProfile%\.wslconfigin a text editor, or create it if it does not exist. Keep all existing settings. In its[wsl2]section, add or updateisolateDistroCgroup=false. Add the section only if it is missing:
Save the file as[wsl2] isolateDistroCgroup=false.wslconfig, without a.txtextension. - In PowerShell, run
wsl --shutdown. This stops every running WSL distribution in your account. - Reopen omnideck, or run
omnideckfor the CLI. Desktop setup resumes; select Open omnideck when it reports that it is ready.
See Microsoft’s WSL configuration reference for the setting’s scope, and the tracked Windows runtime issue for updates.
Need the CLI for a server or automation?
The desktop app above is the default way to use omnideck. Use the standalone CLI if you prefer to install and manage omnideck from a terminal.